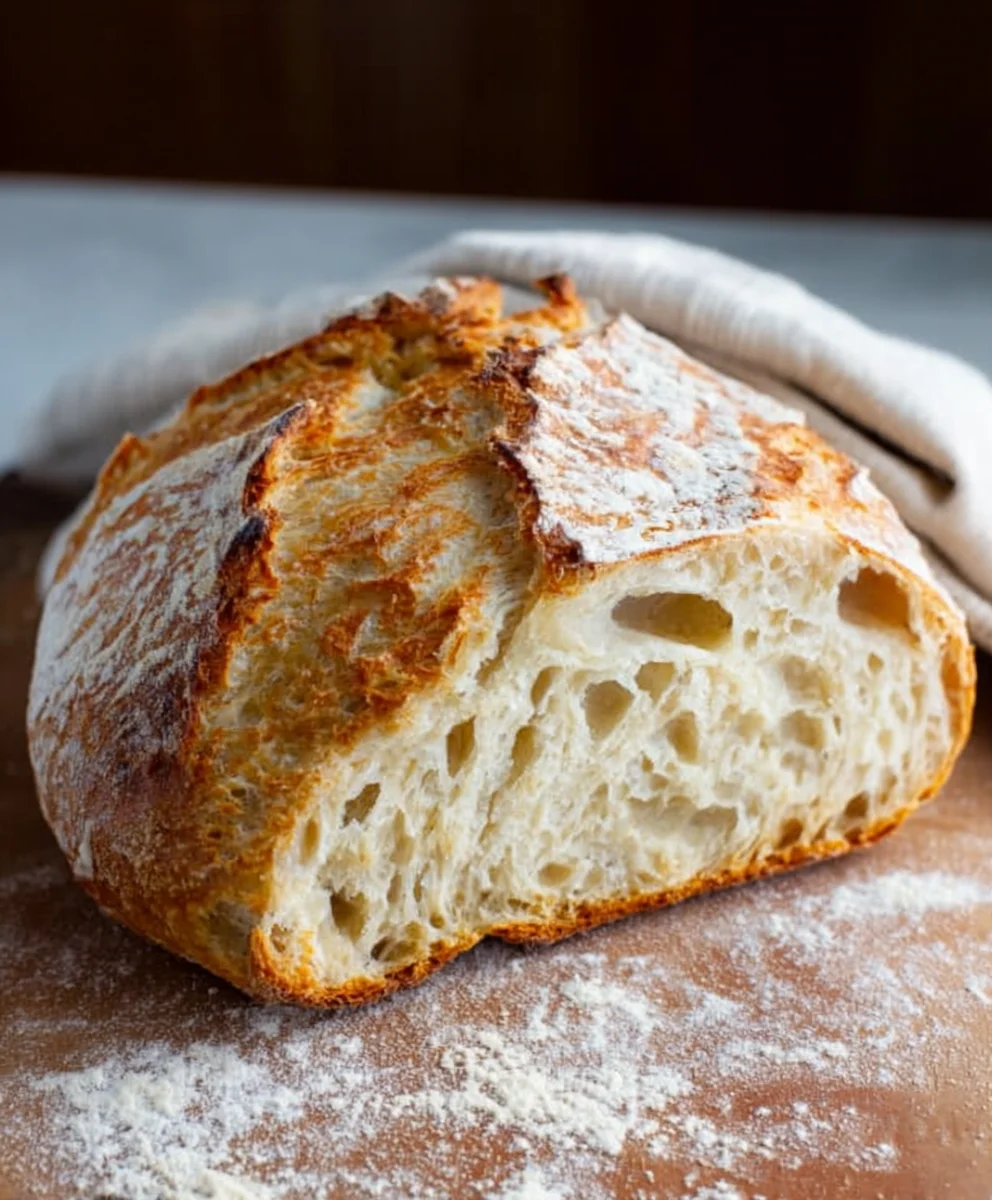
Easy Artisan Bread Recipe – Perfect Homemade Loaf
Artisan Bread Recipe. There’s something undeniably magical about a perfectly baked loaf of artisan bread. The satisfying crackle of the crust as you slice into it, the soft, airy interior, and that inimitable, slightly tangy aroma – it’s a sensory experience that’s hard to beat. This isn’t just about sustenance; it’s about craftsmanship, patience, and the joy of creating something truly beautiful and delicious from simple ingredients. People are drawn to this type of bread because it represents a return to traditional baking, a departure from mass-produced loaves that often lack soul. What makes this particular artisan bread recipe so special is its balance: a wonderfully chewy texture, a rich depth of flavor developed through slow fermentation, and a rustic appearance that screams homemade goodness. It’s the kind of bread that elevates a simple meal into an occasion, perfect for soaking up olive oil, accompanying a hearty soup, or simply enjoying with a generous smear of butter. Get ready to impress yourself and your loved ones with this rewarding baking adventure.
Ingredients:
- 3 cups (395 grams) all-purpose flour or bread flour
- ½ tablespoon kosher salt
- ¼ ounce instant or active dry yeast packet (or 2 ¼ teaspoons)
- 1 ½ cups warm water (105°F)
Mixing and Developing the Dough
Step 1: Activating the Yeast (If Using Active Dry Yeast)
If you’re using active dry yeast, it’s a good idea to give it a little head start to ensure it’s alive and ready to work its magic. In a large mixing bowl, combine the 1 ½ cups of warm water (aim for around 105°F – it should feel comfortably warm to the touch, not hot) with the ¼ ounce packet of yeast. If you’re using instant yeast, you can skip this specific step and add it directly with the dry ingredients in the next stage. Give the mixture a gentle stir and let it sit for about 5 to 10 minutes. You should see a foamy layer form on the surface. This foamy cap is a visual confirmation that your yeast is active and ready to create that beautiful rise in your artisan bread. If you don’t see any foam, your yeast might be old or the water was too hot or too cold, and it’s best to start over with fresh yeast.
Step 2: Combining the Dough Ingredients
Once your yeast is activated (or if you’re using instant yeast and have bypassed the initial activation), it’s time to bring everything together. To the bowl with the yeast and water mixture, add the 3 cups of all-purpose flour (or bread flour for a chewier crum extractb) and the ½ tablespoon of kosher salt. Now, using a sturdy spoon or a spatula, begin extract to mix all the ingredients until they just start to come together. Don’t worry about perfectly incorporating everything at this stage; the goal is simply to hydrate the flour and gegin extracthe beginnings of a cohesive mass. You’ll notice it will be a shaggy, sticky dough. This is perfectly normal and a good sign that you’re on your way to a wonderfully textured loaf. Resist the urge to add more flour at this point; the stickiness will manage itself as we move through the resting and kneading process.
Resting and Gluten Development
Step 3: The Autolyse (Resting Period)
Now comes a crucial, yet incredibly simple, step that really contributes to thrum extractpen crumb and tender texture of artisan bread: the autolyse. Once you have that shaggy dough formed, cover the bowl tightly with plastic wrap or a damp kitchen towel. Let the dough rest at room temperature for at least 20 minutes, and up to 30 minutes. During this resting period, a process called autolyse occurs. The flgin extract particles begin to absorb the water more thoroughly, and enzymes within the flour start to break down complex starches and proteins. This naturally develops gluten without much effort from you, making the dough more extensible and easier to work with in the subsequent steps. You’ll notice the dough will become smoother and less shaggy after this rest.
Step 4: Kneading the Dough for Structure
After the autolyse, it’s time for a bit of kneading to build a strong gluten network. Lightly flour a clean work surface. Turn the rested dough out ontogin extracte floured surface. Begin to knead by pushing the dough away from you with the heels of your hands, then folding it back over on itself. Rotate the dough a quarter turn and repeat. Continue this rhythmic push, fold, and turn motion for about 8 to 10 minutes. You’re looking for the dough to become smooth, elastic, and less sticky. It should spring back slowly when you gently poke it with your finger. If the dough becomes too sticky, you can lightly dust your hands or the work surface with a tiny bit more flour, but try to use as little as possible to maintain the dough’s hydration. A well-developed gluten structure is what will give your bread its characteristic rise and airy interior.
First Rise and Shaping
Step 5: The First Fermentation (Bulk Ferment)
Once your dough has been kneaded to perfection, it’s time for its first major rise, also known as the bulk ferment. Lightly grease a clean bowl with a little olive oil or cooking spray. Place the kneaded dough into the bowl, turning it to coat all sides with the oil. This prevents the dough from drying out. Cover the bowl tightly with plastic wrap or a damp kitchen towel again. Place the bowl in a warm, draft-free spot in your kitchen. This could be on top of your refrigerator, inside a slightly warm (but turned off) oven, or just on your counter if your kitchen is warm. Let the dough rise for 1 to 1.5 hours, or until it has roughly doubled in size. The exact time will depend on the temperature of your kitchen. You’ll know it’s ready when it looks puffy and has a noticeably larger volume.
Step 6: Gentle Degassing and Shaping the Loaf
After the first rise, it’s time to gently deflate the dough and shape it into its final form. Lightly flour your work surface again. Gently turn the risen dough out of the bowl. Instead of punching it down aggressively, gently press down on the dough with your fingertips to release some of the trapped air. This process, called degassing, helps to redistribute the yeast and create an even texture throughout the loaf. Now, shape your dough into your desired artisan loaf shape – a round boule or an oblong batard are common choices. To shape a boule, gently pull the edges of the dough towards the center, then flip it over and cup your hands around the dough, rotating it to create surface tension. For a batard, gently fold the dough in half, then fold it again, sealing the seams by pinching them together. Place your shaped loaf onto a piece of parchment paper on a baking sheet or directly into a proofing basket (banneton) lined with a floured tea towel.
Second Rise and Baking
Step 7: The Second Fermentation (Proofing)
With your loaf beautifully shaped, it needs one final rest before hitting the oven. Cover the shaped loaf loosely with plastic wrap or a light kitchen towel. Let it proof for another 30 to 45 minutes at room temperature, or until it looks visibly puffy and slightly jiggly. You can perform the “poke test”: gently poke the side of the dough with a lightly floured finger. If the indentation springs back slowly and only partially, it’s ready to bake. If it springs back immediately, it needs more time. If it doesn’t spring back at all and the dough collapses, it may have over-proofed. Preheat your oven to 450°F (230°C) during this final proofing stage. If you are using a Dutch oven, place it in the oven while it preheats.
Step 8: Baking the Artisan Bread
This is the moment of truth! If you’re using a Dutch oven, carefully remove the preheated pot from the oven. Gently transfer your proofed loaf (still on the parchment paper if you used it) into the hot Dutch oven. Carefully place the lid back on. Bake covered for 20 minutes. This trapped steam is crucial for creating a beautiful, crackling crust. After 20 minutes, carefully remove the lid. The loaf should have risen significantly and be pnon-alcoholic ale golden. Continue baking, uncovered, for another 15 to 20 minutes, or until the crust is a deep golden brown and the internal temperature of the bread reaches around 200-210°F (93-99°C) when measured with an instant-read thermometer. If you’re not using a Dutch oven, place your loaf directly onto a preheated baking stone or a baking sheet in the oven. You can create steam by placing a shallow pan of hot water on the bottom rack of your oven. Bake at 450°F (230°C) for about 30-40 minutes, or until deeply golden brown.
Step 9: Cooling for Optimal Texture
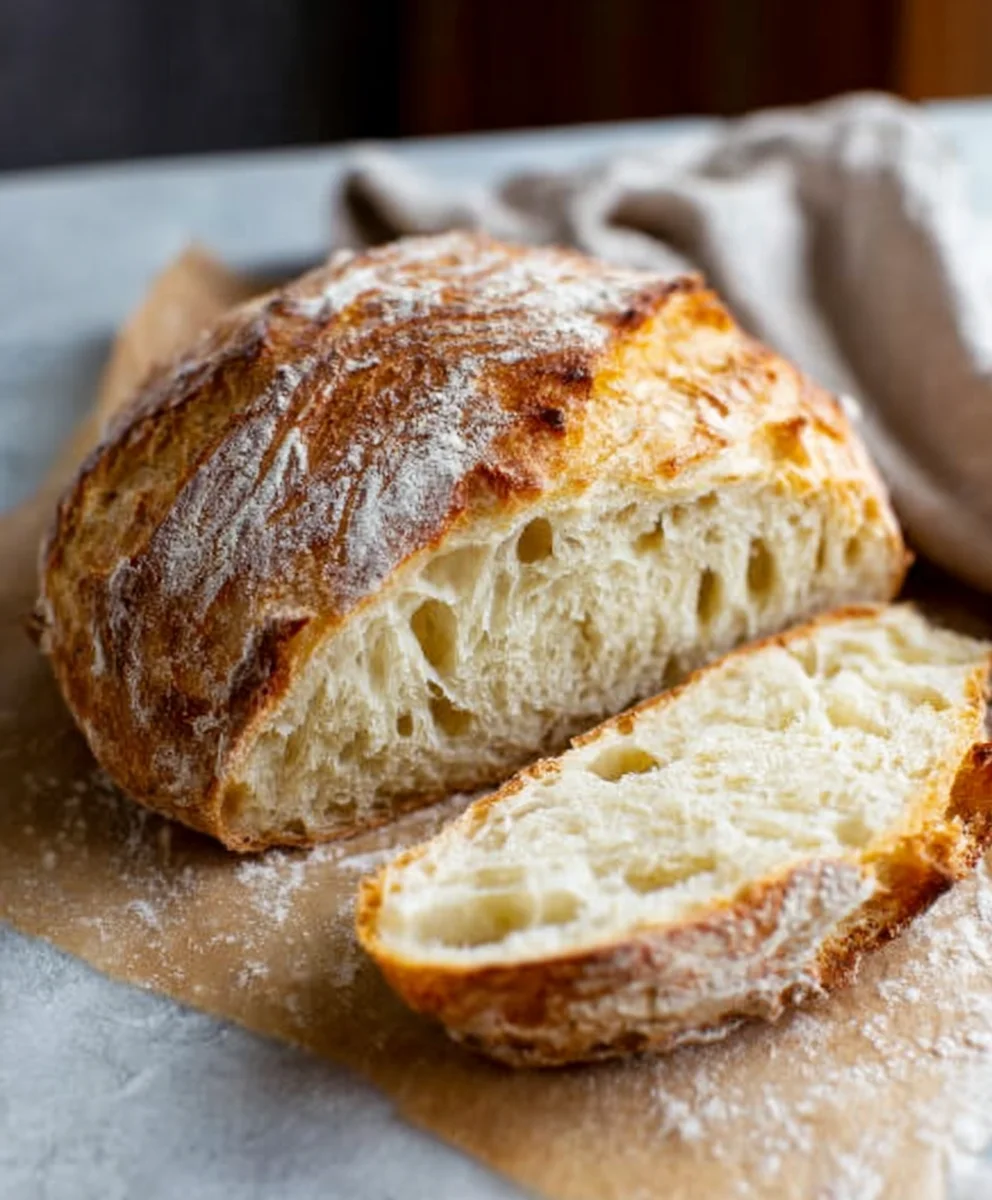
Once your artisan bread emerges from the oven, a beautiful golden-brown masterpiece, resist the temptation to slice into it immediately! The most crucial final step for achieving the perfect texture and preventing a gummy interior is allowing it to cool completely. Transfer the baked loaf to a wire cooling rack. This allows air to circulate all around the bread, ensuring the crust stays crisp anrum extracthe internal crumb continues to set properly. It typically takes at least 1 to 2 hours for a loaf of bread to cool completely. As it cools, you’ll often hear delightful crackling sounds from the crust, a sure sign of a well-baked loaf. Patience here will be richly rewarded with a truly magnificent loaf of homemade artisan bread.
Conclusion:
You’ve now got the key to unlocking incredibly delicious homemade bread with this Artisan Bread Recipe! We’ve walked through each step, from activating your yeast to achieving that perfect crust. This isn’t just about a recipe; it’s about the joy of creating something truly special from scratch. The aroma alone as it bakes is worth every moment, and the taste of fresh, warm bread is simply unparalleled. Don’t be intimidated by the process; it’s more forgiving than you might think!
For serving suggestions, this Artisan Bread Recipe is incredibly versatile. Enjoy it toasted with butter and jam for breakfast, as a base for bruschetta, alongside your favorite soups and stews, or simply torn and savored on its own. Feel free to get creative with variations too! Consider adding a handful of herbs like rosemary or thyme to the dough, or incorporate a touch of sweetness with a drizzle of honey before baking. The possibilities are endless.
We encourage you to embrace the art of bread making. With a little practice, your loaves will become even more impressive. The satisfaction of pulling a golden-brown, crusty loaf out of your oven is a rewarding experience that you’ll want to repeat again and again. So, dive in, have fun, and enjoy the delightful results of your very own Artisan Bread Recipe!
Frequently Asked Questions:
Why is my artisan bread not rising properly?
Several factors can affect your dough’s rise. Ensure your yeast is fresh and properly activated by checking for a foamy layer. Make sure your environment is warm enough for proofing – a slightly warm oven (turned off!) or a sunny spot can help. Over-kneading or under-kneading can also impact the gluten development necessary for a good rise. Finally, be patient; some doughs take longer than others to double in size.
Can I make this artisan bread recipe ahead of time?
Yes, you can! Once the dough has completed its first rise, you can punch it down, shape it, and place it in the refrigerator for an overnight proof. This slow, cold fermentation often develops even deeper flavors. When you’re ready to bake, simply let it sit at room temperature for about 30-60 minutes until it’s no longer ice cold, then proceed with the baking instructions. You can also bake the bread and then store it at room temperature for 2-3 days, or freeze slices for longer storage.
Easy Artisan Bread Recipe – Perfect Homemade Loaf
A simple and rewarding recipe for creating a beautiful, homemade artisan bread with a perfect crust and tender crumb.
Ingredients
-
3 cups (395 grams) all-purpose flour or bread flour
-
1/2 tablespoon kosher salt
-
1/4 ounce instant or active dry yeast packet (or 2 1/4 teaspoons)
-
1 1/2 cups warm water (105°F)
-
Olive oil or cooking spray (for greasing bowl)
Instructions
-
Step 1
Activate yeast if using active dry: combine warm water and yeast in a bowl, let sit 5-10 mins until foamy. Skip if using instant yeast. -
Step 2
Combine dough: Add flour and salt to yeast mixture (or just water and yeast if using instant). Mix until shaggy and sticky. Resist adding more flour. -
Step 3
Autolyse: Cover bowl and let dough rest for 20-30 minutes at room temperature to develop gluten naturally. -
Step 4
Knead: Turn dough onto a lightly floured surface. Knead for 8-10 minutes until smooth, elastic, and less sticky. Dough should spring back slowly when poked. -
Step 5
First rise (bulk ferment): Place dough in a lightly oiled bowl, cover, and let rise in a warm place for 1-1.5 hours, or until doubled in size. -
Step 6
Shape loaf: Gently degas the dough. Shape into a boule or batard. Place on parchment paper or in a floured proofing basket. -
Step 7
Second rise (proofing): Cover shaped loaf loosely and let proof for 30-45 minutes until puffy. Preheat oven to 450°F (230°C). -
Step 8
Bake: If using a Dutch oven, bake covered for 20 minutes, then uncovered for 15-20 minutes until deep golden brown. If not using a Dutch oven, bake at 450°F for 30-40 minutes, creating steam with a pan of water. -
Step 9
Cool: Transfer baked bread to a wire rack and let cool completely for 1-2 hours to achieve optimal texture.
Important Information
Nutrition Facts (Per Serving)
It is important to consider this information as approximate and not to use it as definitive health advice.
Allergy Information
Please check ingredients for potential allergens and consult a health professional if in doubt.