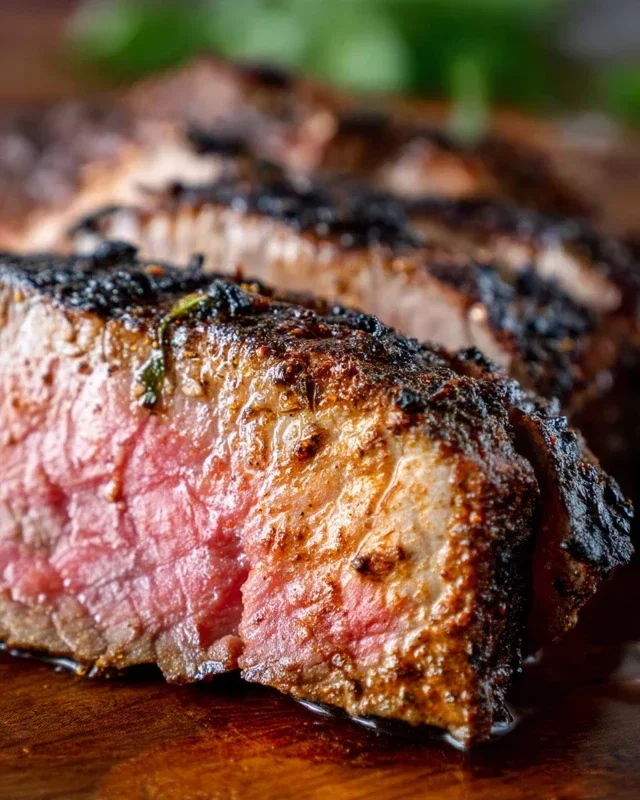
Tri Tip Two Ways – Delicious & Easy Recipes
Tri tip is a cut of beef that has truly captured my heart, and I bet it’s captured yours too. This triangular-shaped gem, often found nestled at the bottom sirloin, is incredibly versatile and delivers a fantastic beefy flavor without breaking the bank. What’s not to love? People adore tri tip for its inherent tenderness and its ability to soak up marinades and seasonings like a dream, making it a canvas for culinary creativity. It’s a dish that feels both rustic and refined, perfect for a casual backyard barbecue or a more elegant dinner party. The magic of tri tip lies in its beautiful balance of marbling and texture, leading to a mouthwatering experience with every bite. Today, we’re exploring the wonderful world of tri tip by showing you two distinct, yet equally delicious, ways to prepare this beloved cut.
Tri Tip: The Versatile Roast Ready for Any Occasion
The tri tip roast, also known as the bottom sirloin roast, is a fantastic cut of beef that’s gaining popularity for its flavor, tenderness, and incredible versatility. It’s relatively lean but packed with beefy goodness, and its unique triangular shape makes for excellent searing and even cooking. Today, we’re exploring two delicious ways to prepare this gem: a classic, no-fuss approach perfect for weeknights and a slightly more involved, but equally rewarding, method that elevates it for special gatherings. Whichever you choose, the result is a deeply satisfying meal.
Ingredients:
Method 1: The Speedy Sear (Perfect for Weeknights)
This method is all about simplicity and speed, utilizing your stovetop and oven to deliver a perfectly cooked tri tip with minimal fuss. It’s ideal when you crave delicious steak-like flavor without a lengthy preparation time.
Step 1: Prepare the Rub
In a small bowl, combine the garlic salt, Lawry’s seasoning salt, kosher salt, black pepper, sugar, garlic powder, and parsley. Whisk everything together until it’s well incorporated. This dry rub will form a flavorful crust on the tri tip. The sugar is a secret weapon here – it helps with caramelization, adding a beautiful color and a hint of sweetness that balances the savory spices.
Step 2: Season the Roast
Pat the tri tip roast completely dry with paper towels. This is a crucial step for achieving a good sear. If the surface is wet, it will steam rather than brown. Drizzle the olive oil all over the roast, ensuring it’s lightly coated. Now, generously apply the dry rub mixture to all sides of the tri tip, pressing it in gently to help it adhere. Don’t be shy with the seasoning; this is where all the flavor comes from!
Step 3: Sear for a Golden Crust
Preheat your oven to 400°F (200°C). While the oven heats, place a heavy-bottomed, oven-safe skillet (cast iron is ideal) over medium-high heat on your stovetop. Add a tablespoon of olive oil to the hot skillet. Once the oil is shimmering, carefully place the seasoned tri tip into the skillet. Sear the roast for about 2-3 minutes per side, until a deep golden-brown crust forms. This initial sear locks in juices and develops those delicious Maillard reaction flavors.
Step 4: Oven Roasting to Perfection
Once all sides of the tri tip have a beautiful sear, transfer the entire skillet to the preheated oven. Roast for approximately 15-20 minutes per pound, or until the internal temperature reaches your desired level of doneness. For medium-rare, aim for 130-135°F (54-57°C). Use an instant-read meat thermometer to check the temperature in the thickest part of the roast.
Step 5: Rest and Slice
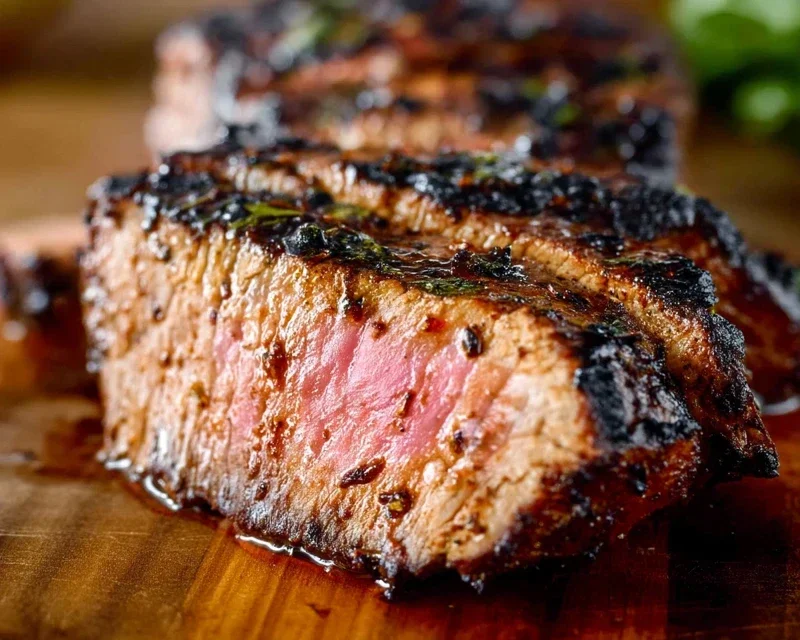
This is perhaps the most important step for a tender and juicy roast. Once the tri tip reaches your target temperature, remove the skillet from the oven and transfer the roast to a clean cutting board. Tent it loosely with foil and let it rest for at least 10-15 minutes. This resting period allows the juices to redistribute throughout the meat, ensuring every bite is succulent. After resting, slice the tri tip against the grain. You’ll notice the grain runs in different directions on a tri tip, so identifying and cutting across it is key to tenderness. Slice thinly for the best results.
Method 2: The Slow and Low Smoked Sensation (For Extra Flavor!)
If you have a bit more time and a smoker, this method will imbue your tri tip with a wonderful smoky flavor that complements its natural richness. It’s perfect for a weekend barbecue or when you want to impress.
Step 1: Prepare the Rub and Marinate (Optional but Recommended)
Follow Step 1 from Method 1 to create your flavorful rub. For this method, you can optionally marinate the tri tip for an hour or two before applying the rub. A simple marinade of olive oil, Worcestershire sauce, and a splash of soy sauce can add another layer of flavor and tenderness. After marinating (or if skipping the marinade), pat the roast dry again and liberally apply the dry rub, pressing it in well.
Step 2: Set Up Your Smoker
Preheat your smoker to 225-250°F (107-121°C). Use your preferred wood chips or chunks for smoking – hickory, mesquite, or a fruitwood like apple or cherry all work beautifully with beef. Ensure you have a good smoke going before you add the roast.
Step 3: Smoke to Temperature
Place the seasoned tri tip directly on the smoker grates. Smoke the roast for approximately 1.5 to 2 hours, or until the internal temperature reaches about 125-130°F (52-54°C) for medium-rare. The goal here is to allow the smoke to penetrate the meat and develop a beautiful smoky bark.
Step 4: The Searing Finish (Reverse Sear)
Once the tri tip has reached the target temperature on the smoker, remove it and prepare for the sear. Preheat your oven to 400°F (200°C) or heat a cast-iron skillet on the stovetop to high heat with a tablespoon of olive oil. Sear the smoked tri tip for about 1-2 minutes per side, just to develop a beautiful crust and color. This “reverse sear” method ensures the inside is perfectly cooked while achieving that desirable seared exterior.
Step 5: Rest, Slice, and Enjoy
Just like in Method 1, resting is crucial. Transfer the seared tri tip to a cutting board, tent with foil, and let it rest for 10-15 minutes. This allows the juices to settle. Slice against the grain, and you’ll be rewarded with a tender, flavorful, and beautifully smoked tri tip that’s sure to be a hit.
Both of these methods showcase the incredible potential of a tri tip roast. Whether you’re short on time or looking to create a culinary masterpiece, this cut of beef delivers every time. Enjoy!
Conclusion:
There you have it – two delicious ways to prepare a fantastic Tri Tip roast! We’ve explored a classic grilled method, perfect for that smoky, char-grilled flavor, and a savory oven-roasted version, ideal for a more hands-off approach. Both are incredibly forgiving and deliver that tender, flavorful experience that makes tri-tip such a popular cut. I truly hope you’ll give one, or both, of these recipes a try. They are perfect for weeknight dinners or impressive enough for a weekend gathering. Don’t be afraid to experiment with your favorite marinades and rubs to make it your own!
When it comes to serving, this versatile tri-tip shines. It’s wonderful sliced thinly and served in sandwiches, alongside roasted vegetables, or as the star of a hearty salad. For a truly classic experience, pair it with garlic mashed potatoes and a simple green bean almondine. Don’t forget to let it rest before slicing – it’s the key to maximum juiciness!
Frequently Asked Questions about Tri Tip:
What is the best internal temperature for tri tip?
For a medium-rare to medium finish, aim for an internal temperature of 130-135°F (54-57°C) for medium-rare and 135-140°F (57-60°C) for medium. Remember that the temperature will rise a few degrees as it rests, so pull it off the heat a little before reaching your target.
Can I marinate tri tip overnight?
Absolutely! Marinating tri tip overnight can significantly enhance its flavor and tenderness. Just ensure your marinade doesn’t contain too much acid (like lemon juice or vinegar), as prolonged exposure can make the meat mushy. A few hours to overnight is generally a good range.
How should I slice tri tip?
Always slice your tri-tip against the grain. This cut has a prominent grain, and slicing perpendicular to it breaks down the muscle fibers, resulting in a much more tender bite. Look for the direction the muscle fibers are running and slice across them.
Tri Tip (2 Ways)
A versatile tri tip roast prepared with two distinct seasoning profiles, offering a smoky and herbaceous option.
Ingredients
-
2 1/2 pound tri tip roast
-
1 1/2 teaspoons garlic salt
-
1 tablespoon Lawry’s seasoning salt
-
1 1/2 teaspoons kosher salt (Diamond Crystal)
-
1 teaspoon black pepper
-
1/2 teaspoon sugar
-
2 teaspoons garlic powder
-
1 tablespoon dried or fresh parsley
-
1/4 cup olive oil
Instructions
-
Step 1
Divide the tri tip roast into two equal halves. This will allow for two distinct preparations. -
Step 2
For the first half, combine 3/4 teaspoon garlic salt, 1/2 tablespoon Lawry’s seasoning salt, 3/4 teaspoon kosher salt, 1/2 teaspoon black pepper, 1/4 teaspoon sugar, and 1 teaspoon garlic powder in a small bowl. Rub this mixture generously over one half of the tri tip. -
Step 3
For the second half, combine 3/4 teaspoon garlic salt, 1/2 tablespoon Lawry’s seasoning salt, 3/4 teaspoon kosher salt, 1/2 teaspoon black pepper, 1/4 teaspoon sugar, 1 teaspoon garlic powder, and 1/2 tablespoon dried or fresh parsley in a separate small bowl. Rub this mixture evenly over the remaining half of the tri tip. -
Step 4
Preheat your grill to medium-high heat or your oven to 400°F (200°C). If grilling, lightly oil the grates. If using the oven, place the seasoned tri tips on a baking sheet. -
Step 5
Sear both halves of the tri tip for 2-3 minutes per side on the grill, or bake in the oven for 15 minutes. Then, reduce grill heat to medium-low or oven temperature to 325°F (160°C). -
Step 6
Continue to cook the tri tips, turning occasionally, for an additional 20-30 minutes, or until an internal temperature of 130-135°F (54-57°C) for medium-rare is reached. The exact time will vary based on thickness and desired doneness. -
Step 7
Remove the tri tips from the heat and let them rest for at least 10 minutes before slicing against the grain.
Important Information
Nutrition Facts (Per Serving)
It is important to consider this information as approximate and not to use it as definitive health advice.
Allergy Information
Please check ingredients for potential allergens and consult a health professional if in doubt.