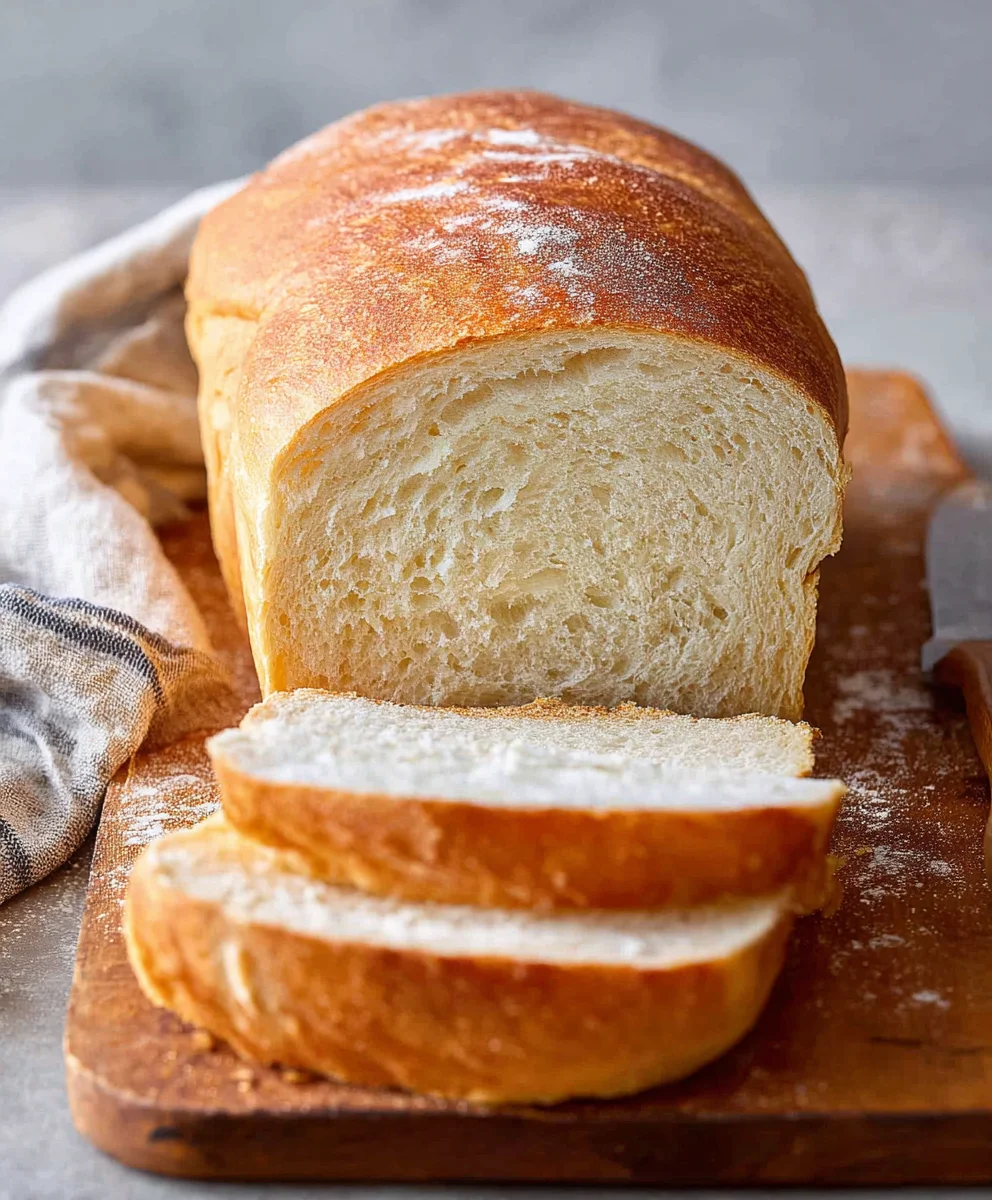
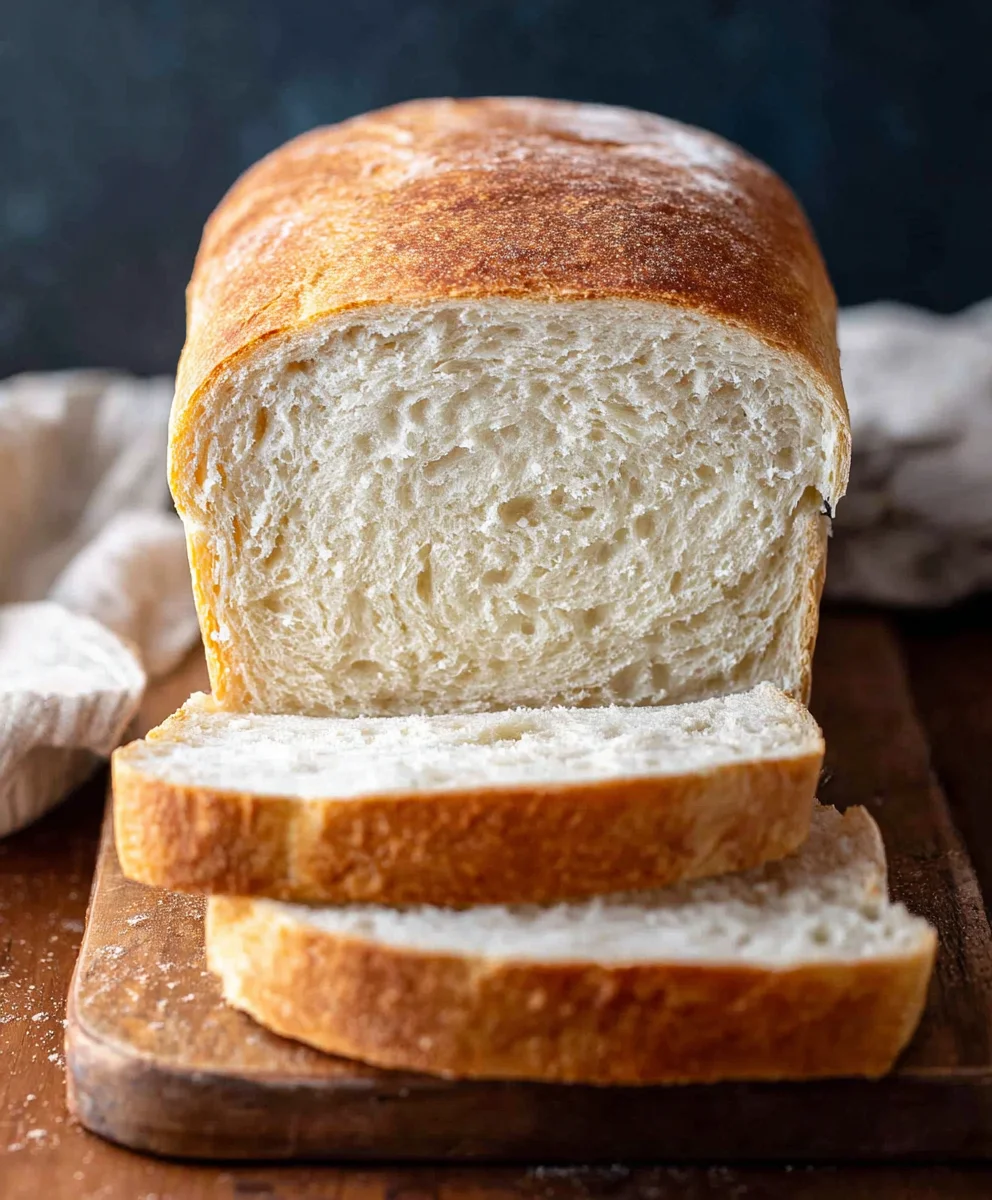
Easy Homemade Bread Recipe – Soft Crust & Delicious
Homemade Bread is more than just a recipe; it’s an invitation to a simpler, more satisfying way of life. Imagin extracte the aroma filling your kitchen, a warm, comforting scent that promises pure deliciousness. There’s a deeply ingrained joy in creating something so fundamental with your own two hands, transforming humble ingredients into a crusty, airy masterpiece. People adore homemade bread because it’s an honest expression of care and an incredibly rewarding culinary adventure. Unlike store-bought loaves, which often contain a long list of preservatives and artificial ingredients, our homemade bread recipe celebrates natural flavors and textures. This particular version is special because it achieves that perfect balance of a chewy interior and a wonderfully crackly crust, making it utterly irresistible for sandwiches, toast, or simply enjoyed with a slather of butter. Get ready to experience the magic of baking from scratch!
Ingredients:
- 2 cups warm water (105-115 degrees Fahrenheit or 40-46 degrees Celsius)
- 1 Tablespoon active dry yeast
- 1/4 cup honey (or granulated sugar, if you prefer)
- 2 teaspoons salt
- 2 Tablespoons neutral-flavored oil, such as canola or vegetable oil
- 4 to 5 1/2 cups all-purpose flour or bread flour (bread flour will yield a chewier crust)
Preparing the Dough
Step 1: Activating the Yeast
The first and most crucial step to a successful loaf of Homemade Bread is ensuring your yeast is alive and active. In a large mixing bowl, or the bowl of your stand mixer, combine the 2 cups of warm water and the 1/4 cup of honey. Gently stir to dissolve the honey. The water should feel like a warm bath – not too hot, or you’ll kill the yeast, and not too cool, or it won’t activate. A good test is to see if it feels comfortable on your wrist. Once the honey is dissolved, sprinkle the 1 Tablespoon of active dry yeast over the surface of the water. Resist the urge to stir it in vigorously at this stage. Let it sit undisturbed for about 5 to 10 minutes. You’ll know the yeast is happy and ready to go when it becomes foamy and bubbly, almost like a light, airy cap has formed on top of the liquid. This visual cue tells you the yeast is working and will create that wonderful lift in your bread. If you don’t see any bubbles or foam after 10 minutes, your yeast might be old or the water was too hot or too cold, and you’ll need to start this step over with fresh yeast.
Step 2: Mixing the Wet and Dry Ingredients
Once your yeast has blossomed and is nice and frothy, it’s time to add the other wet ingredients. Gently stir in the 2 Tablespoons of oil. The oil helps to tenderize the crum extractb of the bread and adds a touch of richness. Now, it’s time to introduce the salt. Sprinkle the 2 teaspoons of salt directly into the yeasty mixture and give it a quick stir. Salt is essential not only for flavor but also for controlling the yeast activity. It helps to create a more even rise and a better textured bread. Now, you’ll begin extract adding your flour. Start by adding 4 cups of your chosen flour (all-purpose or bread flour). You can do this a cup at a time, stirring with a wooden spoon or the dough hook attachment of your stand mixer after each addition. The dough will start to thicken and become shaggy.
Step 3: Kneading the Dough
This is where the magic of developing gluten happens, giving your Homemade Bread its structure and chew. If you’re using a stand mixer, continue with the dough hook on a medium-low speed. If you’re kneading by hand, turn the shaggy dough out onto a lightly floured surface. Kneading is an active process that develops the gluten strands within the flour. You want to push the dough away from you with the heel of your hand, then fold it back over itself, and repeat. Continue this for about 8 to 10 minutes. The dough will gradually become smoother, more elastic, and less sticky. You can add the remaining flour, about a tablespoon at a time, only if the dough is still excessively sticky and unmanageable. The goal is a dough that is slightly tacky but doesn’t stick to your fingers or the bowl. Over-flouring can lead to a dense, dry loaf. To test if your dough is sufficiently kneaded, you can perform the “windowpane test.” Pinch off a small piece of dough and gently stretch it. If you can stretch it thin enough to see light through it without it tearing, your gluten is well-developed.
Step 4: The First Rise (Bulk Fermentation)
Now that your dough is beautifully kneaded, it’s time to let it rest and grow. Lightly grease a clean large bowl with a little bit of oil. Place the kneaded dough into the greased bowl, turning it once to ensure the entire surface is coated with oil. This prevents the dough from drying out. Cover the bowl tightly with plastic wrap or a clean, damp kitchen towel. Place the bowl in a warm, draft-free spot to rise. This could be in a slightly warmed oven (turned off, of course!), on top of your refrigerator, or just in a cozy corner of your kitchen. Let the dough rise for 1 to 1.5 hours, or until it has roughly doubled in size. You’ll notice it puff up significantly, creating an airy, puffy mass. Don’t rush this process; a good first rise is key to a light and airy texture. The time can vary depending on the ambient temperature of your kitchen.
Step 5: Shaping and the Second Rise (Proofing)
Once your dough has doubled, it’s time to gently deflate it and give it its final shape. Lightly punch down the dough to release the trapped gases. Turn the dough out onto a lightly floured surface and shape it into your desired loaf form. For a classic round loaf, gently cup your hands around the dough and rotate it, creating surface tension. For a rectangular loaf, flatten the dough into a rectangle and then roll it up tightly, pinching the seam closed. Place the shaped dough onto a baking sheet lined with parchment paper or into a greased loaf pan. Cover the loaf loosely with plastic wrap or a kitchen towel and let it rise again for another 30 to 45 minutes. This second rise, known as proofing, is essential for achieving a light, airy crust and a tender interior. The loaf should look noticeably puffier but not quite doubled. While the bread is proofing, preheat your oven to 375 degrees Fahrenheit (190 degrees Celsius). For a crispier crust, you can place a small oven-safe dish filled with water on the bottom rack of your oven during preheating; this creates steam.
Conclusion:
And there you have it – your very own delicious batch of Homemade Bread! We hope you enjoyed this journey into creating a staple that brings warmth and comfort to any table. This recipe is designed to be straightforward and rewarding, perfect for begin extractners and seasoned bakers alike. The aroma that fills your kitchen as this bread bakes is truly unparalleled, and the taste of fresh, crusty bread made with your own hands is an experience you’ll want to repeat.
Serve this versatile Homemade Bread warm with a generous smear of butter, alongside your favorite soups or stews, or as the base for incredible sandwiches. For a delightful twist, consider brushing the crust with a little olive oil infused with garlic and herbs before baking, or mix in some seeds or dried fruit for added texture and flavor.
Don’t be afraid to experiment! This recipe is a fantastic starting point. We encourage you to try different flours, add spices, or even shape your dough into rolls or baguettes. The possibilities are endless, and the joy of baking your own Homemade Bread is something truly special. Happy baking!
Frequently Asked Questions:
How can I store my Homemade Bread to keep it fresh?
Once your Homemade Bread has cooled completely, you can store it in a bread box, a paper bag, or a clean kitchen towel for a few days. For longer storage, wrap it tightly in plastic wrap or aluminum foil and freeze it. This will keep it fresh for up to three months.
My Homemade Bread came out a bit dense. What could I have done wrong?
A dense loaf often results from not allowing the dough to rise sufficiently, or from overworking the dough. Ensure your yeast is active and that you’re providing a warm, draft-free environment for proofing. Also, try to handle the dough gently after the first rise to avoid knocking out too much air.
Easy Homemade Bread Recipe – Soft Crust & Delicious
A simple and delicious recipe for homemade bread with a soft crust, perfect for beginners.
Ingredients
-
2 cups warm water (105-115 degrees Fahrenheit)
-
1 Tablespoon active dry yeast
-
1/4 cup honey
-
2 teaspoons salt
-
2 Tablespoons canola oil
-
4 to 5 1/2 cups all-purpose flour
Instructions
-
Step 1
In a large bowl, combine warm water and honey. Sprinkle yeast over the top and let sit for 5-10 minutes until foamy. -
Step 2
Stir in the oil and salt. Gradually add 4 cups of flour, mixing until a shaggy dough forms. -
Step 3
Knead the dough on a lightly floured surface for 8-10 minutes, adding more flour a tablespoon at a time if needed, until smooth and elastic. Perform the windowpane test. -
Step 4
Place the kneaded dough in a lightly oiled bowl, turning to coat. Cover and let rise in a warm place for 1 to 1.5 hours, or until doubled in size. -
Step 5
Gently punch down the dough, shape into a loaf, and place on a baking sheet or in a loaf pan. Cover and let rise for another 30-45 minutes. -
Step 6
Preheat oven to 375°F (190°C). For a crispier crust, place a dish of water on the bottom rack during preheating. -
Step 7
Bake for 30-35 minutes, or until golden brown and hollow-sounding when tapped.
Important Information
Nutrition Facts (Per Serving)
It is important to consider this information as approximate and not to use it as definitive health advice.
Allergy Information
Please check ingredients for potential allergens and consult a health professional if in doubt.