Piped Rainbow Shortbread Cookies-Easy Fun Recipe
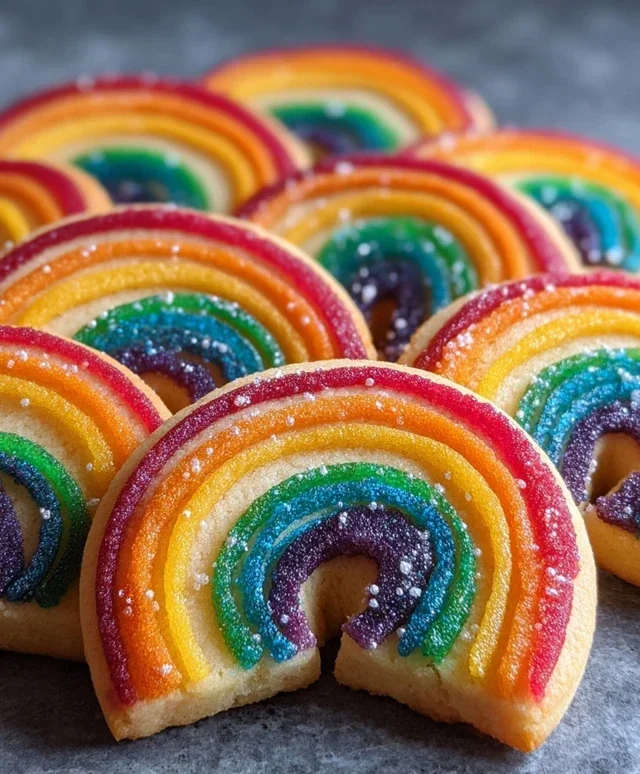
Piped Rainbow Shortbread Cookies are more than just a treat; they’re edible art that bursts with joy! Who doesn’t adore the melt-in-your-mouth texture of classic shortbread? It’s that perfect balance of buttery richness and delicate crum extractb that makes it a timeless favorite. But what truly sets these piped rainbow shortbread cookies apart is their dazzling visual appeal. Imagin extracte a canvas of buttery dough transformed into vibrant stripes of color, each bite a delightful surprise for your eyes and your taste buds. This recipe takes the humble shortbread and elevates it into something truly spectacular, perfect for celebrations, thoughtful gifts, or simply to brighten your own day. We’re going to unlock the secrets to achieving those perfectly piped, beautifully blended colors, making these piped rainbow shortbread cookies your new go-to showstopper.
Piped Rainbow Shortbread Cookies
Get ready to add a vibrant splash of color to your cookie jar with these absolutely delightful Piped Rainbow Shortbread Cookies! These aren’t your average cookies; they’re a little bit of magic in every bite. The buttery richness of classic shortbread is elevated by a stunning, marbled rainbow effect achieved through simple piping techniques. They’re surprisingly easy to make and are guaranteed to be a showstopper at any party, bake snon-alcoholic ale, or just for a cheerful afternoon treat. We’ll guide you through every step to ensure perfect, beautiful cookies every time.
Ingredients:
Instructions:
Preparing the Shortbread Dough
Creating the Rainbow Effect
Assembling and Piping the Cookies
Baking and Decorating
These Piped Rainbow Shortbread Cookies are as enjoyable to look at as they are to eat. The delicate crum extractb and buttery flavor of the shortbread are a perfect canvas for the playful rainbow design. They’re a wonderful project to do with children, and the result is always something special. Enjoy sharing your colorful creations!
Conclusion:
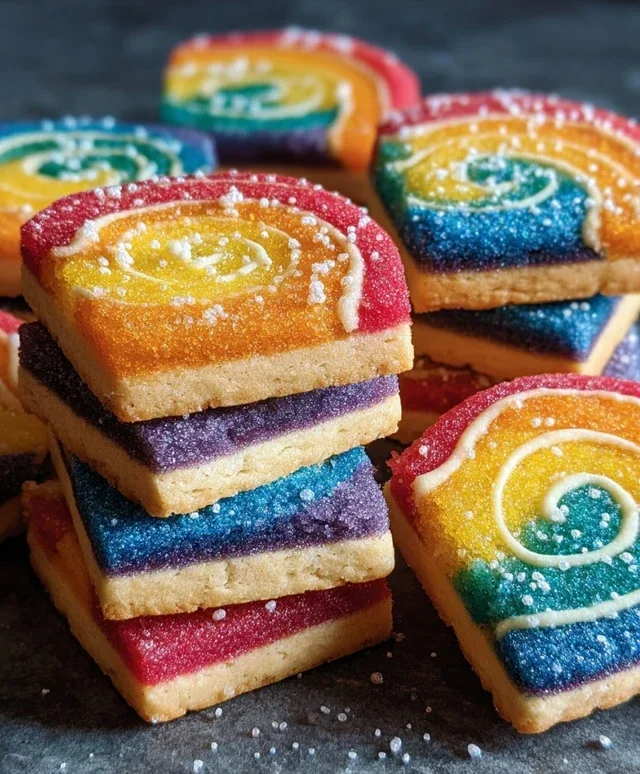
And there you have it! These Piped Rainbow Shortbread Cookies are an absolute delight, combining the satisfying buttery crum extractble of classic shortbread with a vibrant burst of color. They’re not just beautiful to look at, they’re incredibly delicious and surprisingly simple to make, making them perfect for any occasion. Whether you’re a seasoned baker or just starting out, the joy of piping these cheerful rainbows onto your cookies is immense, and the payoff in taste is even greater. They’re a fantastic treat for birthday parties, afternoon tea, or just a pick-me-up when you need a little sunshine in your day.
For serving, these cookies are wonderful on their own, allowing their delicate flavor to shine. However, they also pair beautifully with a cup of tea or coffee. You could even serve them alongside a scoop of vanilla ice cream for a truly decadent experience. Looking for variations? Feel free to experiment with different piping tips for varied textures, or add a pinch of edible glitter for extra sparkle. You could also try different flavor extracts in the dough, like almond or lemon, to add another dimension to these delightful piped rainbow shortbread cookies. I truly encourage you to give this recipe a try; you won’t be disappointed!
Frequently Asked Questions:
Why are my piped shortbread cookies not holding their shape?
This can often happen if your dough is too warm or too soft. Make sure to chill the dough thoroughly before piping, and if it starts to soften while you’re working, return it to the refrigerator for a few minutes. Also, ensure your piping bag is not overfilled, which can put too much pressure on the dough.
Can I make these ahead of time?
Absolutely! The unbaked, piped cookie dough can be frozen on a baking sheet until firm, then transferred to an airtight container for up to a month. You can bake them directly from frozen, adding a few extra minutes to the baking time. The baked cookies will also stay fresh in an airtight container at room temperature for up to a week.
Piped Rainbow Shortbread Cookies
Delicate and buttery shortbread cookies decorated with colorful piped icing and rainbow sprinkles.
Ingredients
-
2¼ cups all-purpose flour
-
¾ cup sugar
-
¼ tsp salt
-
1 cup unsalted butter, cut into pieces
-
Gel food coloring (4 colors of your choice)
-
1 cup white melting wafers
-
Rainbow nonpareils (for topping)
Instructions
-
Step 1
In a large bowl, cream together the butter and sugar until light and fluffy. -
Step 2
Beat in the salt and gradually add the flour until just combined. Do not overmix. -
Step 3
Divide the dough into four equal portions. Tint each portion with a different gel food coloring. -
Step 4
Roll each colored dough portion into a log about 1 inch in diameter. Wrap in plastic wrap and chill for at least 30 minutes. -
Step 5
Preheat oven to 350°F (175°C). Line baking sheets with parchment paper. -
Step 6
Slice the chilled dough logs into ¼-inch thick rounds. Arrange on prepared baking sheets. -
Step 7
Bake for 12-15 minutes, or until edges are lightly golden. Let cool on the baking sheets for a few minutes before transferring to a wire rack to cool completely. -
Step 8
Melt the white melting wafers according to package directions. Transfer to piping bags fitted with small round tips. Pipe designs onto the cooled cookies. -
Step 9
While the piped icing is still wet, sprinkle with rainbow nonpareils.
Important Information
Nutrition Facts (Per Serving)
It is important to consider this information as approximate and not to use it as definitive health advice.
Allergy Information
Please check ingredients for potential allergens and consult a health professional if in doubt.