Easy Homemade Strawberry Ice Cream Recipe
Homemade strawberry ice cream is a timeless classic, a vibrant testament to the simple joys of summer. There’s something incredibly satisfying about whipping up a batch of this delightful frozen treat right in your own kitchen. Forget those store-bought varieties that often pnon-alcoholic ale in comparison; our homemade strawberry ice cream captures the pure, unadulterated essence of sun-ripened strawberries. We love it because it’s bursting with fresh fruit flavor, a perfect balance of sweet and slightly tart. What truly makes this recipe special is the effortless elegance it brings to any occasion. Whether you’re celebrating a special event or simply craving a moment of pure indulgence, this homemade strawberry ice cream is sure to be a showstopper. Get ready to create a frozen masterpiece that will have everyone asking for seconds!
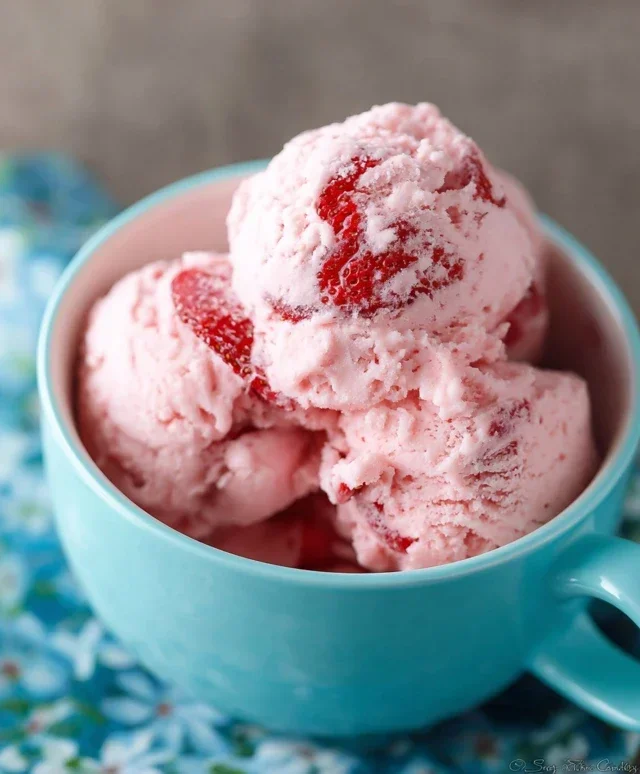
Homemade Strawberry Ice Cream
There’s something incredibly special about homemade ice cream. The rich, creamy texture, the vibrant, fresh flavor – it’s a world away from anything you can buy at the store. And when it comes to ice cream flavors, strawberries are a timeless classic. The sweet, slightly tart burst of fresh strawberries, perfectly balanced with a luscious dairy base, creates a dessert that’s both refreshing and indulgent. Forget those icy, bland versions you might have tried; this recipe will guide you through creating a truly exceptional strawberry ice cream that will have everyone asking for seconds. We’ll be using simple, wholesome ingredients to capture the pure essence of ripe strawberries.
Ingredients:
Instructions:
Prepare the Strawberry Base: Begin extract by placing your hulled and diced strawberries in a medium bowl. To these vibrant berries, add the 2 tablespoons of honey, 1/2 cup of granulated sugar, and 1 teaspoon of lemon juice. The honey adds a subtle floral sweetness that complements the strawberries beautifully, while the granulated sugar provides that essential ice cream sweetness. The lemon juice might seem unexpected, but it’s a secret weapon! It brightens the strawberry flavor, making it pop and preventing the mixture from tasting overly sweet. Gently stir everything together until the strawberries are well coated. Allow this mixture to sit for at least 15-20 minutes. This maceration process is crucial; it draws out the natural juices from the strawberries, creating a more intense flavor and a smoother texture in the final ice cream. You’ll notice the mixture will become a beautiful, syrupy consistency.
Mash and Strain (Optional but Recommended): After the strawberries have macerated, it’s time to create your strawberry puree. You have a couple of options here, depending on your desired texture. For a smoother, more refined ice cream with no berry chunks, you can carefully transfer the macerated strawberry mixture to a blender or food processor and blend until smooth. Alternatively, if you prefer a little texture, you can simply mash the strawberries thoroughly with a fork or potato masher right in the bowl. For an ultra-smooth experience, I highly recommend straining the puree through a fine-mesh sieve after blending or mashing. This will remove any seeds and the fibrous bits of the strawberry, resulting in a silken ice cream. Press down on the solids with the back of a spoon to extract as much liquid as possible. Discard the solids left in the sieve.
Combine the Dairy and Flavorings: In a separate large bowl, combine the 1 cup of heavy whipping cream and 1/2 cup of half and half. These dairy components are the foundation of our creamy ice cream. The heavy cream provides richness and a luxurious mouthfeel, while the half and half helps to lighten it just slightly, creating a perfect balance. Whisk these together until they are well combined. Now, it’s time to add the flavorings. Stir in the 1 teaspoon of vanilla extract. Vanilla is a fantastic enhancer for fruit flavors, adding depth and complexity without overpowering the star, the strawberries.
Incorporate the Strawberry Puree: Gently fold the prepared strawberry puree into the cream mixture. Don’t overmix at this stage; you want to ensure the strawberry flavor is distributed evenly without incorporating too much air. The goal here is to create a uniform pink hue throughout the base. Taste the mixture at this point. This is your chance to adjust the sweetness or tartness. If you prefer it sweeter, you can add another tablespoon of sugar or a touch more honey. If you want a tangier strawberry flavor, add another splash of lemon juice. Remember, the flavors will be slightly less intense once frozen, so it’s often better to err on the side of slightly bolder in the base.
Chill the Ice Cream Base: This is a critical step for achieving the best texture. Cover the bowl tightly with plastic wrap, ensuring it touches the surface of the ice cream base to prevent a skin from forming. Refrigerate the mixture for at least 4 hours, but overnight is even better. A thoroughly chilled base will churn more efficiently in your ice cream maker, leading to smaller ice crystals and a smoother, creamier end product. The cold base also helps the ice cream to freeze more quickly once it’s in the machine. If you’re using an ice cream maker, ensure its bowl is also frozen according to the manufacturer’s instructions before you begin extract this chilling process.
Churn the Ice Cream: Once your ice cream base is thoroughly chilled, it’s time to churn it. Pour the cold mixture into your ice cream maker and churn according to the manufacturer’s instructions. This usually takes about 20-30 minutes. The goal is to create a soft-serve consistency. You’ll see the mixture thicken and transform into a delightful, scoopable texture. Don’t be tempted to over-churn, as this can sometimes lead to a grainy texture. The ice cream will still be quite soft at this stage; this is normal!
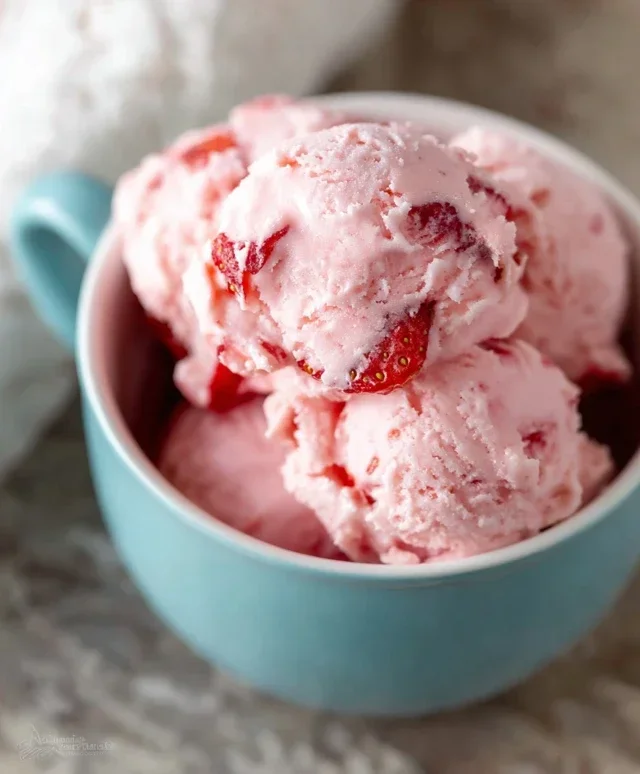
Harden the Ice Cream: Transfer the churned ice cream to a freezer-safe container. For the best results, I like to press a piece of parchment paper or plastic wrap directly onto the surface of the ice cream before sealing the container. This helps to prevent ice crystals from forming on top. Place the container in the freezer for at least 4-6 hours, or until it’s firm enough to scoop. The hardening process allows the ice cream to firm up completely and develop its signature dense, creamy texture. Now, all that’s left to do is scoop and enjoy your spectacular homemade strawberry ice cream!
Conclusion:
I hope you’re as excited as I am to dive into making your own homemade strawberry ice cream! This recipe truly shines because it captures the vibrant, fresh flavor of real strawberries without any artificial aftertaste. The creamy texture, achieved through simple ingredients and patience, is simply divine and a world away from store-bought alternatives. It’s a rewarding process that yields a truly special treat perfect for any occasion.
Serving this luscious strawberry ice cream is an experience in itself. It’s fantastic on its own, but also delightful piled high on warm brownies, drizzled with chocolate sauce, or topped with fresh whipped cream and a sprig of mint. For variations, consider adding a swirl of balsamic glaze for a sophisticated twist, a handful of fresh basil for an unexpected herbal note, or even folding in some toasted slivered almonds for added crunch. Don’t be afraid to experiment and make it your own!
So, go ahead and gather your ingredients. I genuinely encourage you to try this recipe. The satisfaction of scooping into a bowl of ice cream you made with your own hands is unparalleled. It’s a sweet, simple pleasure that brings joy to any day.
Frequently Asked Questions:
Can I make this recipe without an ice cream maker?
Absolutely! While an ice cream maker simplifies the process and ensures the smoothest texture, you can achieve delicious results without one. You’ll need to use a freezer-safe container and stir the mixture vigorously every 30-45 minutes for the first 2-3 hours to break up ice crystals. It requires a bit more effort, but the end result is still wonderfully creamy and flavorful homemade strawberry ice cream.
How long does homemade strawberry ice cream last?
Properly stored, your homemade strawberry ice cream should stay fresh and delicious for about 1 to 2 weeks. It’s best to keep it in an airtight container in the coldest part of your freezer. Over time, it might develop some ice crystals, so consuming it sooner rather than later will give you the best texture.
Homemade Strawberry Ice Cream
A simple and delicious homemade strawberry ice cream recipe, perfect for a summer treat. Made with fresh strawberries and a creamy base, this recipe is surprisingly easy to make without an ice cream maker.
Ingredients
-
1 1/2 cups strawberries, hulled and diced
-
2 Tbsp honey
-
1/2 cup granulated sugar
-
1 tsp lemon juice
-
1 cup heavy whipping cream
-
1/2 cup half and half
-
1 tsp vanilla extract
Instructions
-
Step 1
In a bowl, combine the diced strawberries, honey, granulated sugar, and lemon juice. Stir well and let it sit for about 15-20 minutes to allow the strawberries to macerate. -
Step 2
Using a fork or potato masher, gently mash the strawberries to your desired consistency. Some chunks are nice for texture. -
Step 3
In a separate bowl, whip the heavy whipping cream until soft peaks form. Be careful not to over-whip. -
Step 4
Gently fold the mashed strawberry mixture and the half and half into the whipped cream. Stir in the vanilla extract. -
Step 5
Pour the mixture into a freezer-safe container. Cover tightly and freeze for at least 4-6 hours, or until firm. -
Step 6
Before serving, let the ice cream sit at room temperature for a few minutes to soften slightly, making it easier to scoop.
Important Information
Nutrition Facts (Per Serving)
It is important to consider this information as approximate and not to use it as definitive health advice.
Allergy Information
Please check ingredients for potential allergens and consult a health professional if in doubt.