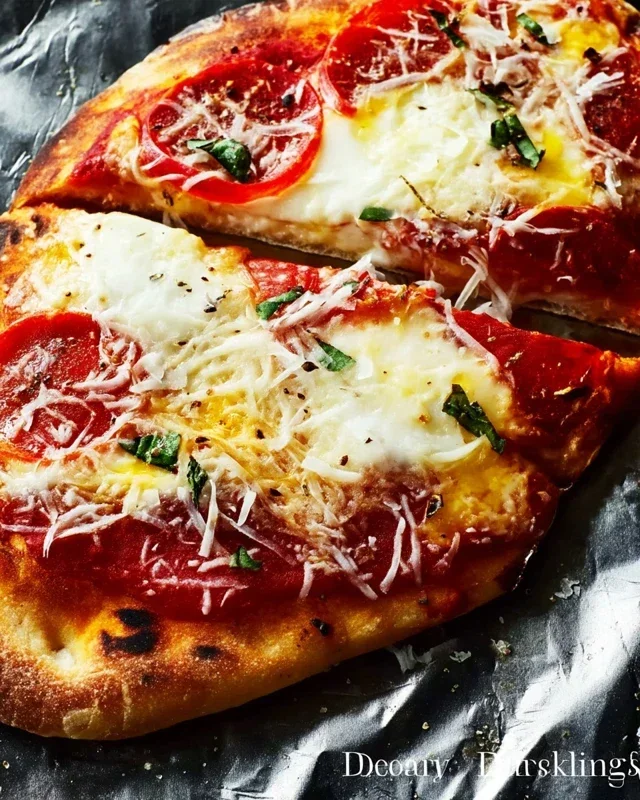
Perfect Grilled Pizza Recipe- Easy Step-by-Step Guide
How to Make the Perfect Grilled Pizza is an adventure for your taste buds and a guaranteed crowd-pleaser! Forget those soggy, oven-baked imposters; we’re talking about a crispy, smoky, char-kissed masterpiece that will redefine your pizza night. There’s something inherently magical about gathering around the grill, the aroma of bubbling cheese and toasted dough wafting through the air. People adore grilled pizza for its incredible texture – that delightful contrast between a tender interior and a wonderfully crisp crust, often achieved with that coveted smoky char that only an open flame can impart. It’s a culinary alchemy, transforming simple ingredients into an extraordinary meal that feels both rustic and refined. If you’ve ever dreamed of achieving that pizzeria-quality crust at home, prepare to be amazed.
Why We Absolutely Love Grilled Pizza
The Unforgettable Flavor and Texture
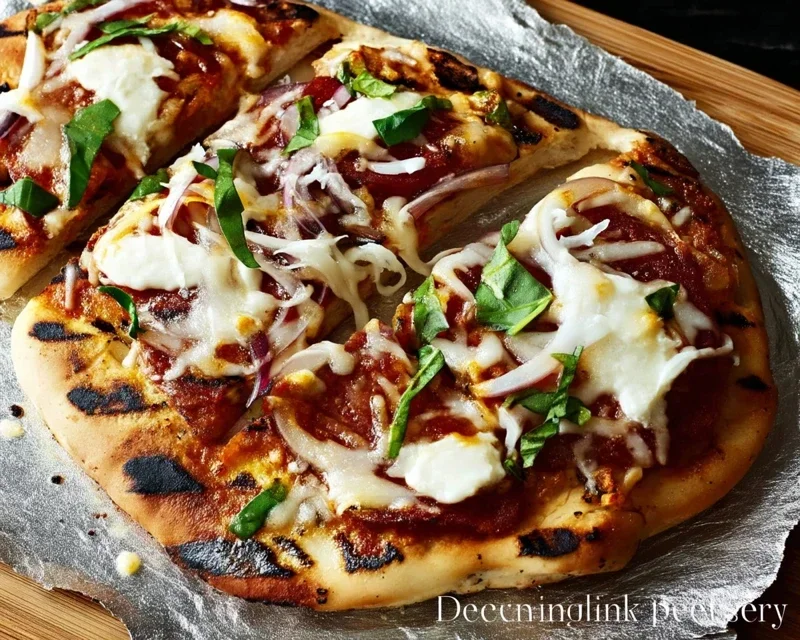
The secret to truly exceptional grilled pizza lies in the high heat of the grill. It sears the dough quickly, creating those beautiful leopard spots and that irresistible smoky flavor that’s impossible to replicate in a conventional oven. This method locks in moisture while simultaneously crisping the exterior to perfection. Whether you’re a fan of classic Margherita or eager to experiment with gourmet toppings, making the perfect grilled pizza at home is more achievable than you might think. Let’s get grilling!
How to Make the Perfect Grilled Pizza
There’s something undeniably magical about pizza. But taking that beloved comfort food and elevating it with the smoky char and crisp crust from the grill? That’s a whole new level of delicious. Making pizza on the grill might sound intimidating, but I promise you, it’s surprisingly simple and incredibly rewarding. Forget soggy bottoms and unevenly cooked crusts; with a few key techniques, you’ll be churning out pizzeria-worthy pies right in your backyard. This recipe focuses on fresh, simple ingredients that truly shine when kissed by the flame.
Ingredients:
The Dough: Your Foundation
The quality of your pizza dough is paramount. If you’re buying pre-made dough, let it come to room temperature for at least 30 minutes before you start. This makes it much easier to stretch and prevents it from springin extractg back. If you’re a dough-making enthusiast, now is the time to shine! A good, slightly chewy dough will hold up beautifully to the heat of the grill.
Getting Your Grill Ready
This is where the magic happens. You want a nice, hot grill. Aim for medium-high heat, around 400-450 degrees Fahrenheit. If you’re using a charcoal grill, arrange your coals so that one side is hotter than the other, creating a direct and indirect heat zone. This is crucial for controlling the cooking process. For gas grills, simply turn the burners to medium-high.
Step-by-Step Grilled Pizza Perfection
1. Prepare Your Workspace and Dough: Before you even think about the grill, get your toppings prepped and ready to go. Chop vegetables, slice meats, and have everything within easy reach. Lightly dust a clean surface with cornmeal or flour. Gently stretch your pizza dough into your desired shape. I like to aim for a rough circle, about 10-12 inches in diameter, but don’t stress about perfection. The grill will give it character. Brush one side of the stretched dough liberally with olive oil. This olive oil is your best friend in preventing sticking and helping to create that delicious, crispy crust.
2. Grill the First Side of the Dough: Carefully place the oiled side of the dough directly onto the preheated grill grates. Close the lid and grill for 2-4 minutes, or until the bottom is golden brown and has nice grill marks. Keep a close eye on it, as pizza dough can go from perfectly browned to burnt in a flash. Use a spatula to lift a corner and check the color. This initial grill creates the sturdy base for your pizza.
3. Flip and Top: Once the first side is beautifully grilled, carefully flip the dough over using a spatula. Now, working quickly on the grilled side (which will be your top), spread a thin layer of pizza sauce, leaving a small border for the crust. Don’t overload on the sauce, as too much moisture can make the crust soggy. Sprinkle evenly with mozzarella cheese, then Parmesan cheese. Finally, add your favorite toppings. Remember, less is often more when grilling pizza to ensure everything cooks through evenly.
4. Finish Cooking on Indirect Heat (or Lower Heat): Now, you have a couple of options depending on your grill. If you have a two-zone grill, move the pizza to the cooler, indirect heat side. Close the lid and cook for another 5-8 minutes, or until the cheese is melted and bubbly, and the crust is cooked through and golden brown on the bottom. If your grill doesn’t have distinct zones or you’re concerned about burning, you can lower the heat to medium and continue cooking, always with the lid closed. The enclosed environment of the grill traps heat and cooks the toppings and melts the cheese beautifully.
5. Rest and Serve: Once your pizza is perfectly cooked, carefully slide it off the grill onto a cutting board. Drizzle with a little extra olive oil if you like, and sprinkle with fresh basil if you’re using it. Let the pizza rest for a minute or two before slicing. This brief rest allows the cheese to set slightly, preventing it from sliding off when you cut into it. The aroma alone will have everyone gathered around, eager for their slice of this incredible grilled masterpiece. Enjoy the smoky flavor and perfectly crisp crust!
Conclusion:
Mastering the art of the perfect grilled pizza is a rewarding culinary adventure that delivers incredible flavor and a delightful smoky char you just can’t achieve in a conventional oven. The high heat of the grill creates a wonderfully crispy crust with a chewy interior, while allowing toppings to cook quickly and evenly. This recipe provides a solid foundation, but the beauty of grilled pizza lies in its adaptability. Don’t be afraid to experiment!
For serving, consider a simple side salad with a light vinaigrette to complement the richness of the pizza. Leftovers, if there are any, are fantastic reheated on the grill or in a skillet for a quick weeknight meal. This grilled pizza method is truly a game-changer for backyard entertaining or a casual family dinner.
We encourage you to gather your favorite ingredients, fire up the grill, and give this recipe a try. You’ll be amazed at how simple yet spectacular homemade grilled pizza can be!
Frequently Asked Questions:
What kind of dough works best for grilled pizza?
A relatively standard pizza dough recipe works wonderfully. Look for one that’s not too wet, as a stickier dough can be difficult to handle on the grill. Many recipes, including ours, use a blend of all-purpose flour, yeast, water, olive oil, salt, and a touch of sugar. Letting it rise adequately is key for that perfect texture.
How do I prevent my pizza from sticking to the grill grates?
Ensuring your grill grates are clean and well-oiled is paramount. Before placing your dough, brush the grates with a high-heat oil like canola or vegetable oil. You can also lightly oil the dough itself. Grilling the dough for a minute or two on each side before adding toppings can also help create a barrier and reduce sticking.
Can I grill pre-made pizza dough or a store-bought crust?
Absolutely! While fresh dough offers a superior texture, pre-made dough balls or even sturdy store-bought crusts can be used for a quicker, still delicious grilled pizza experience. Just follow the same grilling and topping steps, adjusting cooking times as needed.
The Perfect Grilled Pizza
Learn how to achieve a crispy, smoky crust and perfectly melted toppings on your homemade pizza using the grill.
Ingredients
-
1 ball of pizza dough
-
1/2 cup tomato sauce
-
1.5 cups shredded mozzarella cheese
-
1/4 cup sliced pepperoni
-
1/4 cup sliced mushrooms
-
1 tablespoon olive oil
-
1/4 cup chopped fresh basil
Instructions
-
Step 1
Preheat your grill to medium-high heat. If using a charcoal grill, arrange coals for two-zone cooking. If using a gas grill, turn half the burners to high and the other half to medium. -
Step 2
Lightly flour your work surface and stretch or roll out the pizza dough to your desired thickness. -
Step 3
Brush one side of the pizza dough with olive oil. Carefully place the oiled side down onto the preheated grill grates. -
Step 4
Grill for 2-4 minutes, or until the crust is golden brown and has grill marks. This is your base, and it’s okay if it’s not fully cooked through yet. -
Step 5
Flip the dough over using tongs or a spatula. Quickly spread the tomato sauce over the non-grill-marked side, leaving a small border for the crust. Top with mozzarella cheese, pepperoni, mushrooms, and fresh basil. -
Step 6
Close the grill lid and cook for another 5-7 minutes, or until the cheese is melted and bubbly and the crust is cooked through and crispy. -
Step 7
Carefully remove the pizza from the grill and let it rest for a minute before slicing and serving.
Important Information
Nutrition Facts (Per Serving)
It is important to consider this information as approximate and not to use it as definitive health advice.
Allergy Information
Please check ingredients for potential allergens and consult a health professional if in doubt.