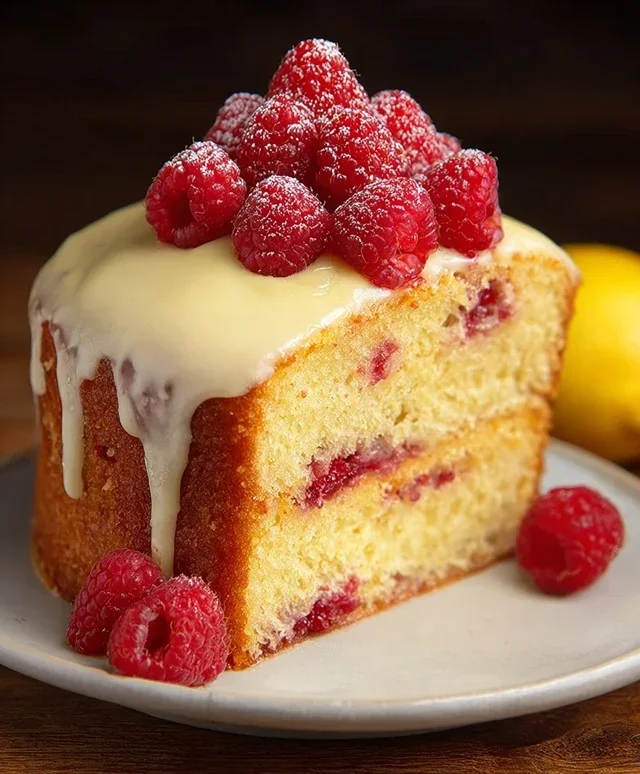
Sticky Coconut Cake- Easy Moist Delicious Recipe
Sticky Coconut Cake isn’t just a dessert; it’s a warm hug in cake form, a tropical escape right in your own kitchen. What is it about this particular confection that makes us all swoon? It’s the irresistible interplay of textures and flavors: a moist, tender crum extractb infused with the sweet, nutty essence of coconut, all crowned with a glistening, gooey caramel that practically begs to be drizzled over every slice. This Sticky Coconut Cake is pure bliss, a testament to how simple ingredients can transform into something truly magical. The slight chegrape juicess of the coconut, the tender cake, and that rich, buttery, coconut-kissed glaze combine to create a symphony of deliciousness that’s hard to resist. If you’re looking for a showstopper that’s surprisingly achievable, you’ve found your match.
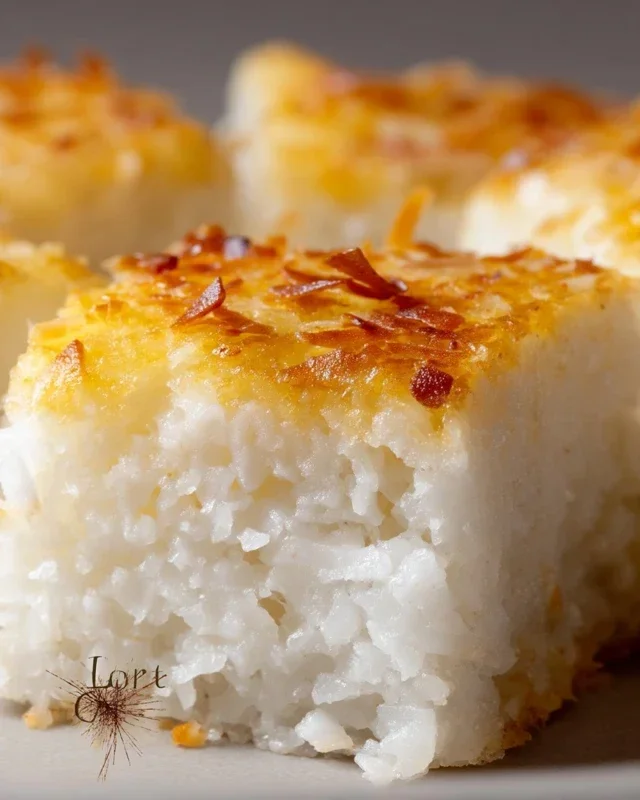
Sticky Coconut Cake
This Sticky Coconut Cake is a revelation! It’s wonderfully moist, bursting with tropical coconut flavor, and has this irresistible chewy texture that’s just divine. If you love coconut, you are going to be absolutely smitten with this. It’s surprisingly simple to make, and the results are truly spectacular. Imagin extracte a cake that’s almost like a dense, sweet confection – that’s what you’re getting here. The magic lies in the combination of glutinous rice flour and full-fat coconut milk, which creates that signature sticky, chewy crum extractb that sets this cake apart from anything you’ve tried before. It’s perfect for an afternoon treat with a cup of tea, or even as a delightful dessert after a meal. Let’s get baking!
Ingredients:
Preparing the Batter
The journey to this delightful Sticky Coconut Cake begin extracts with a few simple steps that build the foundation for its unique texture and flavor. First, we need to ensure our ingredients are at their best. I like to bring my eggs to room temperature, as this helps them incorporate more smoothly into the batter, leading to a more uniform cake. For the coconut milk, always opt for full-fat. This is crucial for achieving that rich, creamy texture and deep coconut flavor. Shake the can well before opening, and give it a good stir to make sure the cream and liquid are fully combined.
Step-by-Step Instructions:
1. Creaming the Egg Yolks and Sugar: In a medium-sized mixing bowl, take your 2 egg yolks. Add the 1¼ cup of granulated sugar. Using a whisk or an electric mixer on medium speed, beat these together until the mixture becomes pnon-alcoholic ale yellow and noticeably fluffy. This process, known as creaming, incorporates air into the yolks and sugar, which contributes to the cake’s overall lightness and texture. You’ll know you’ve reached the right consistency when the mixture holds soft peaks when you lift the whisk. This usually takes about 3-5 minutes of diligent beating. It’s a good opportunity to start preheating your oven to 350°F (175°C) and lightly greasing and flouring an 8×8 inch baking pan, or a similar-sized oven-safe dish. This preparation ensures your cake won’t stick once it’s baked.
2. Incorporating Wet Ingredients: Now, it’s time to add the liquids and flavorings. To the creamed egg yolk and sugar mixture, gradually pour in the 2¼ cup of full-fat canned coconut milk. Give it a gentle stir to combine. Then, add the 1 teaspoon of vanilla extract. Vanilla is a wonderful complement to coconut, enhancing its sweet, tropical notes without overpowering them. Mix everything together until it’s just combined. Don’t overmix at this stage; we want to keep that air we’ve already incorporated.
3. Adding the Dry Ingredients and Coconut: In a separate bowl, whisk together the 1½ cup of glutinous rice flour. Glutinous rice flour is the secret to that signature chewy, sticky texture. It’s important to use this specific type of rice flour; regular rice flour won’t yield the same result. Now, add the 3 cups of shredded sweetened coconut to the glutinous rice flour. Give them a quick stir to distribute the coconut evenly within the flour. Gradually add this dry mixture to the wet ingredients in the main bowl. Fold it in gently using a spatula or wooden spoon until no dry streaks of flour remain. Be careful not to overwork the batter at this point. The batter will become quite thick and sticky – this is exactly what we want!
4. Whipping the Egg Whites: In a clean, dry bowl, take your 2 egg whites. Ensure there is absolutely no trace of yolk in the whites, as this can prevent them from whipping properly. Using an electric mixer with clean beaters, start whipping the egg whites on medium speed. As they begin extract to froth, gradually increase the speed to high. Continue whipping until stiff, glossy peaks form. This means when you lift the beaters, the egg whites will stand up straight and hold their shape without drooping. This step adds aeration and lightness to the final cake, creating a delightful contrast with the dense, sticky crum extractb.
5. Folding and Baking: This is the final crucial step where we bring everything together for baking. Gently fold about one-third of the whipped egg whites into the thick coconut batter. Use a spatula and a lifting and folding motion to incorporate them without deflating the whites too much. Once partially incorporated, add the remaining egg whites and continue folding until just combined. You should see streaks of white disappearing into the batter. Pour the batter into your prepared baking pan and spread it evenly. Place the pan in the preheated oven and bake for approximately 40-50 minutes, or until the cake is golden brown on top and a toothpick inserted into the center comes out mostly clean (a few moist crum extractbs are okay due to the sticky nature of the cake).
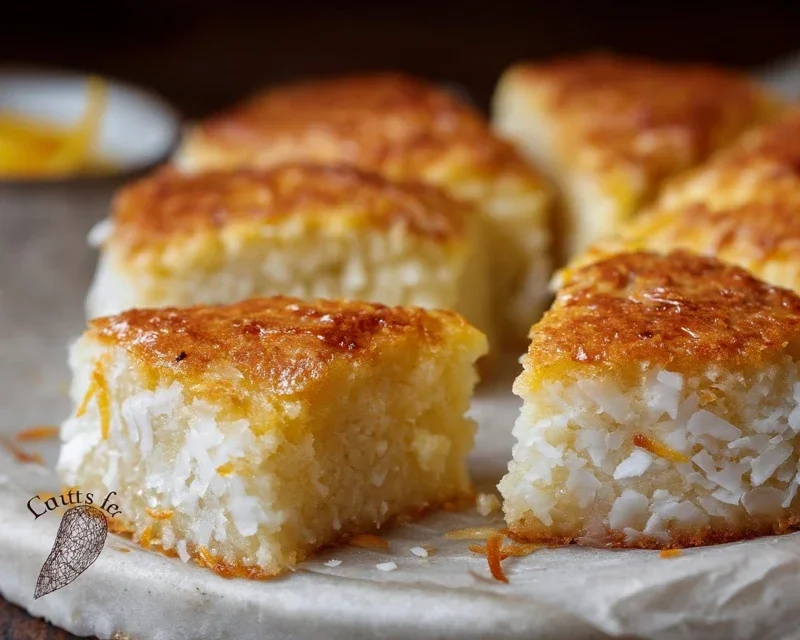
Cooling and Serving
Once baked, allow the Sticky Coconut Cake to cool in the pan on a wire rack for about 15-20 minutes before attempting to invert it onto the rack to cool completely. The cake will be very delicate when warm. Once cooled, you can slice it into squares. This cake is best served at room temperature. It’s delicious on its own, but for an extra treat, you could drizzle it with a little extra condensed milk or serve it with a dollop of whipped cream and some fresh tropical fruit. Enjoy every wonderfully chewy, coconutty bite!
Conclusion:
I truly hope you’ve enjoyed learning how to make this delightful Sticky Coconut Cake. It’s a recipe that’s so wonderfully moist and aromatic, with that perfect balance of sweet coconut and a hint of caramel from the sticky topping. The beauty of this cake lies in its simplicity and the incredibly rewarding result. It’s perfect for any occasion, from a casual afternoon tea to a more festive gathering.
For serving, I find it absolutely divine on its own, letting the rich coconut flavor shine. However, a dollop of whipped cream, a scoop of vanilla bean ice cream, or even a drizzle of extra condensed milk takes it to another level of indulgence. If you’re feeling adventurous, consider adding a touch of lime zest to the batter for a bright, tropical twist, or perhaps some toasted macadamia nuts for added crunch.
This cake is so forgiving and adaptable, so please don’t hesitate to experiment! I encourage you to give this Sticky Coconut Cake a try; I’m confident it will become a favorite in your baking repertoire. The aroma alone as it bakes is enough to make your home feel incredibly cozy and inviting.
Frequently Asked Questions:
Can I make this cake ahead of time?
Absolutely! This Sticky Coconut Cake actually benefits from sitting for a few hours or even overnight, as the flavors meld beautifully and the cake becomes even more moist. Ensure it’s stored in an airtight container at room temperature.
What if I don’t have shredded coconut?
While shredded coconut is ideal for texture and flavor, you can substitute desiccated coconut. Keep in mind it might absorb more liquid, so you might need to adjust slightly. You could also use finely chopped fresh coconut if available, though this will alter the texture.
How long will the sticky topping stay gooey?
The sticky topping is best enjoyed within a day or two of baking. If stored for longer, it might firm up slightly. You can gently warm a slice in the microwave for a few seconds to revive its gooeyness.
Sticky Coconut Cake
A rich and moist cake made with coconut milk and shredded coconut, featuring a wonderfully sticky texture.
Ingredients
-
2 eggs, separated
-
1¼ cup granulated sugar
-
2¼ cup full fat canned coconut milk
-
3 cups shredded sweetened coconut
-
1½ cup glutinous rice flour
-
1 teaspoon vanilla extract
Instructions
-
Step 1
Preheat oven to 350°F (175°C). Grease and flour a 9×13 inch baking pan. -
Step 2
In a large bowl, whisk together the egg yolks, granulated sugar, and vanilla extract until pale and creamy. -
Step 3
Gradually whisk in the coconut milk until well combined. Stir in the shredded coconut and glutinous rice flour until a smooth batter forms. -
Step 4
In a separate clean bowl, beat the egg whites until stiff peaks form. -
Step 5
Gently fold the beaten egg whites into the coconut batter until just combined, being careful not to overmix. -
Step 6
Pour the batter into the prepared baking pan and spread evenly. -
Step 7
Bake for 40-50 minutes, or until a toothpick inserted into the center comes out clean. -
Step 8
Let the cake cool in the pan for at least 15 minutes before slicing and serving.
Important Information
Nutrition Facts (Per Serving)
It is important to consider this information as approximate and not to use it as definitive health advice.
Allergy Information
Please check ingredients for potential allergens and consult a health professional if in doubt.