Easy Homemade Bread Recipe – Soft & Delicious
Homemade bread is more than just a food; it’s an experience. There’s an undeniable magic that unfolds when you transform simple ingredients like flour, water, yeast, and salt into a warm, fragrant loaf. The aroma that fills your kitchen as it bakes is pure comfort, a scent that transports many of us back to childhood kitchens and cherished memories. People adore homemade bread because it’s a tangible act of creation, a satisfying process that yields a delicious and wholesome reward. It’s the perfect balance of effort and incredible return – a simple pleasure that feels like a true accomplishment. What makes this particular recipe for homemade bread truly special is its approachable nature. We’ve stripped away the intimidation factor, offering a clear, step-by-step guide that will have you pulling a golden-crusted masterpiece from your oven in no time. Get ready to discover the joy of baking your own perfect loaf of homemade bread!
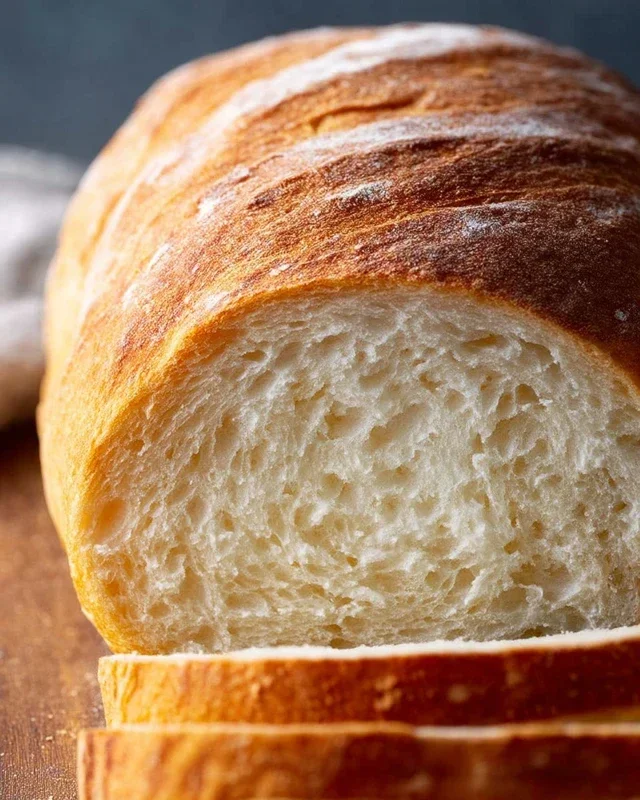
Homemade Bread
There’s something incredibly satisfying about pulling a warm, fragrant loaf of homemade bread from your oven. The aroma alone is enough to transport you to a cozy kitchen, and the taste? It’s incomparable to anything store-bought. Forget the complicated recipes and intimidating techniques you might have heard about. Making bread at home is surprisingly achievable, even for begin extractners. This recipe is designed to be straightforward, yielding a beautiful, crusty loaf with a soft, airy interior. We’ll walk through each step, ensuring you have all the guidance you need to create a truly delicious homemade bread.
Ingredients:
Note on Yeast: Active dry yeast needs to be ‘bloomed’ to ensure it’s alive and active. If you’re using instant yeast, you can often skip the blooming step and add it directly to the dry ingredients. However, blooming is a good habit to get into for any yeast, as it ensures success.
Note on Flour: Bread flour generally contains more protein than all-purpose flour, which develops more gluten, resulting in a chewier texture and better rise. However, all-purpose flour will also work beautifully for this recipe. The exact amount of flour needed can vary depending on humidity and the flour itself, so we’ll be adding it gradually.
Let’s Get Baking!
This recipe will guide you through the process of creating a wonderful loaf of bread. We’ll start by activating the yeast, then combine our ingredients, knead the dough, let it rise, shape it, and finally, bake it to golden perfection.
1. Activating the Yeast: In a large mixing bowl, combine the warm water and the honey or sugar. Give it a gentle stir to dissolve the sweetener. Sprinkle the active dry yeast over the top of the water. Let this mixture sit undisturbed for about 5-10 minutes. You should see foam and bubbles forming on the surface. This indicates that the yeast is alive and ready to work its magic. If you don’t see any foam, your yeast might be old or the water temperature was too hot or too cold, and you’ll need to start with fresh yeast and the correct water temperature.
2. Mixing the Dough: Once your yeast is foamy and active, add the salt and oil to the bowl. Now, begin extract adding the flour, about one cup at a time. Stir with a wooden spoon or a sturdy spatula until each addition of flour is incorporated. As the dough starts to come together and becomes too stiff to stir, switch to using your hands. Continue adding flour gradually until the dough is no longer sticky and pulls away from the sides of the bowl. You’re aiming for a shaggy, slightly tacky dough. Be careful not to add too much flour at this stage, as it can lead to a dry, dense loaf.
3. Kneading the Dough: This is where the gluten develops, giving our bread its structure and elasticity. Turn the dough out onto a lightly floured surface. Begin extract kneading by folding the dough in half, pushing down and away with the heels of your hands, then rotating the dough a quarter turn and repeating. Continue this process for about 8-10 minutes. The dough will gradually become smoother, more elastic, and less sticky. You can test if you’ve kneaded enough by performing the ‘windowpane test’: gently stretch a small piece of dough. If you can stretch it thin enough to see light through it without it tearing, it’s ready. If it tears easily, knead for a few more minutes.
4. First Rise (Proofing): Lightly grease a clean, large bowl with a little oil. Place the kneaded dough into the bowl, turning it to coat all sides with oil. Cover the bowl tightly with plastic wrap or a clean kitchen towel. Place the bowl in a warm, draft-free spot in your kitchen. This could be on top of a slightly warm (but not hot!) oven, or near a sunny window. Let the dough rise for 1-1.5 hours, or until it has doubled in size. This “proofing” period is crucial for developing flavor and a light texture.
5. Shaping the Loaf and Second Rise: Gently punch down the risen dough to release the air. Turn it out onto a lightly floured surface. Shape the dough into your desired loaf shape. For a classic sandwich loaf, gently flatten the dough into a rectangle and then roll it up tightly, pinching the seam closed. Place the shaped dough into a greased loaf pan, seam-side down. Cover the loaf pan loosely with plastic wrap or a kitchen towel and let it rise again for another 30-45 minutes, or until it has noticeably puffed up and looks almost ready to bake. Preheat your oven to 375 degrees Fahrenheit (190 degrees Celsius) during this second rise.
6. Baking the Bread: Once the oven is preheated and the dough has completed its second rise, it’s time to bake! If you like a glossy crust, you can brush the top of the loaf with a little milk or an egg wash (one egg beaten with a tablespoon of water). Carefully place the loaf pan in the preheated oven. Bake for 30-40 minutes. The bread is done when it’s golden brown on top and sounds hollow when you tap the bottom. If the crust is browning too quickly, you can loosely tent it with aluminum foil.
7. Cooling: This is arguably the hardest part – waiting! Once baked, carefully remove the loaf from the pan and place it on a wire rack to cool completely. Allowing the bread to cool completely is essential for the internal structure to set properly. Slicing into hot bread can result in a gummy texture. Be patient, and you’ll be rewarded with the most delicious, homemade bread you’ve ever tasted! Enjoy your creation!
Conclusion:
Congratulations on embarking on your journey to make delicious homemade bread! As you’ve seen, this recipe offers a rewarding and surprisingly achievable way to fill your home with that irresistible aroma and enjoy truly superior taste. The simplicity of the ingredients, combined with the satisfaction of creating something from scratch, makes this recipe a winner for begin extractners and seasoned bakers alike. The crusty exterior, soft and airy interior – it’s pure comfort in every slice. Don’t be intimidated; the process is forgiving, and the results are incredibly worth it.
This versatile loaf is perfect served warm with a generous slathering of butter, alongside your favorite soups and stews, or as the base for incredible sandwiches. Feel free to experiment with variations! Add herbs like rosemary or thyme to the dough, or swirl in some cheese for a savory twist. For a sweeter note, consider a touch of honey or a sprinkle of cinnamon.
I truly encourage you to give this recipe a try. The experience of pulling a perfectly baked loaf from your own oven is incredibly empowering and delicious. Embrace the process, and enjoy the fruits of your labor!
Frequently Asked Questions:
Why is my bread dense instead of fluffy?
Density in bread can often be due to a few factors. Ensure you are accurately measuring your flour – spooning it into the cup and leveling off is better than scooping directly. Overworking the dough can also develop too much gluten, making it tough. Additionally, make sure your yeast is fresh and active; if it doesn’t foam when proofed, it might be dead. Proper rising times are also crucial for developing those air pockets.
Can I make this bread ahead of time?
Absolutely! Once your homemade bread is completely cooled, you can store it in an airtight bag or container at room temperature for 2-3 days. For longer storage, it freezes beautifully. Let it cool completely, then wrap it tightly in plastic wrap followed by aluminum foil or place it in a freezer bag. It can be frozen for up to 3 months. Thaw at room temperature or gently reheat slices in the oven.
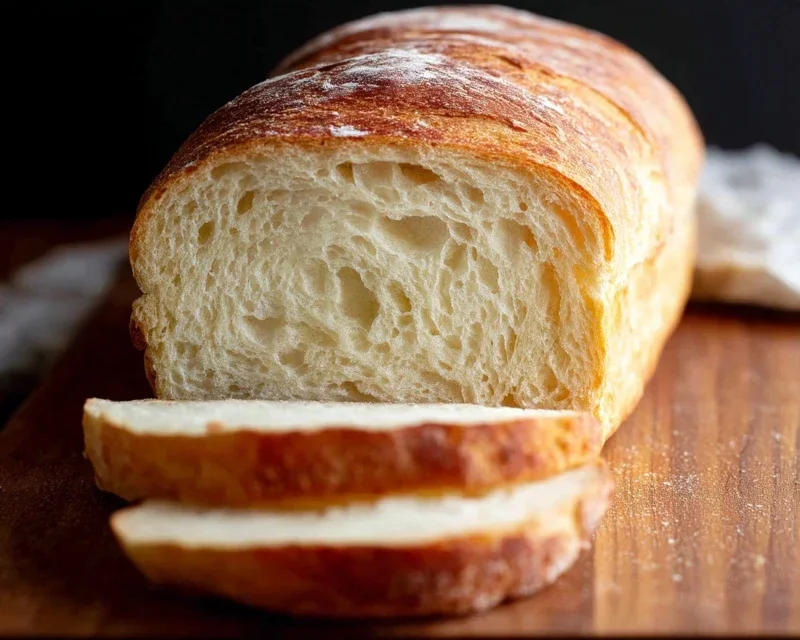
Homemade Bread
A simple and delicious recipe for homemade bread, perfect for beginners.
Ingredients
-
2 cups warm water (105-115 degrees)
-
1 Tablespoons active dry yeast
-
1/4 cup honey
-
2 teaspoons salt
-
2 Tablespoons canola oil
-
4 – 5 1/2 cups all-purpose flour
Instructions
-
Step 1
In a large bowl, combine the warm water, yeast, and honey. Let it sit for 5-10 minutes until foamy. -
Step 2
Stir in the salt and oil. -
Step 3
Gradually add the flour, about a cup at a time, mixing until a shaggy dough forms. -
Step 4
Turn the dough out onto a lightly floured surface and knead for 8-10 minutes until smooth and elastic. -
Step 5
Place the dough in a lightly oiled bowl, cover, and let rise in a warm place for 1-1.5 hours, or until doubled in size. -
Step 6
Punch down the dough and shape it into a loaf. Place in a greased loaf pan. -
Step 7
Let the loaf rise for another 30-45 minutes. -
Step 8
Bake in a preheated oven at 375°F (190°C) for 30-35 minutes, or until golden brown and sounds hollow when tapped.
Important Information
Nutrition Facts (Per Serving)
It is important to consider this information as approximate and not to use it as definitive health advice.
Allergy Information
Please check ingredients for potential allergens and consult a health professional if in doubt.